Why am I setting this up?
When you got your SheetXAI lifetime deal, you had two options for how to power the AI:
- Use SheetXAI credits — we run everything on our side, you just use it.
- Bring your own key (BYOK) — you connect your own AI provider and run on your own key.
You're set up as BYOK, which is totally fine — it just means SheetXAI runs on your own AI provider key instead of our credits. You can bring a key from any supported provider — OpenRouter, OpenAI, Claude, LLM Gateway, or Ollama. Among the many providers, OpenRouter is our preferred: one key unlocks almost every model (OpenAI, Claude, Gemini, and hundreds more), and it's still the most cost-effective option. (If you'd rather not manage a key, you can still add SheetXAI credits to your account instead.)
This guide walks you through setting up OpenRouter in about 2 minutes.
Do this first: add a little credit to OpenRouter before creating your key, so you're ready to go the moment you paste it into SheetXAI.
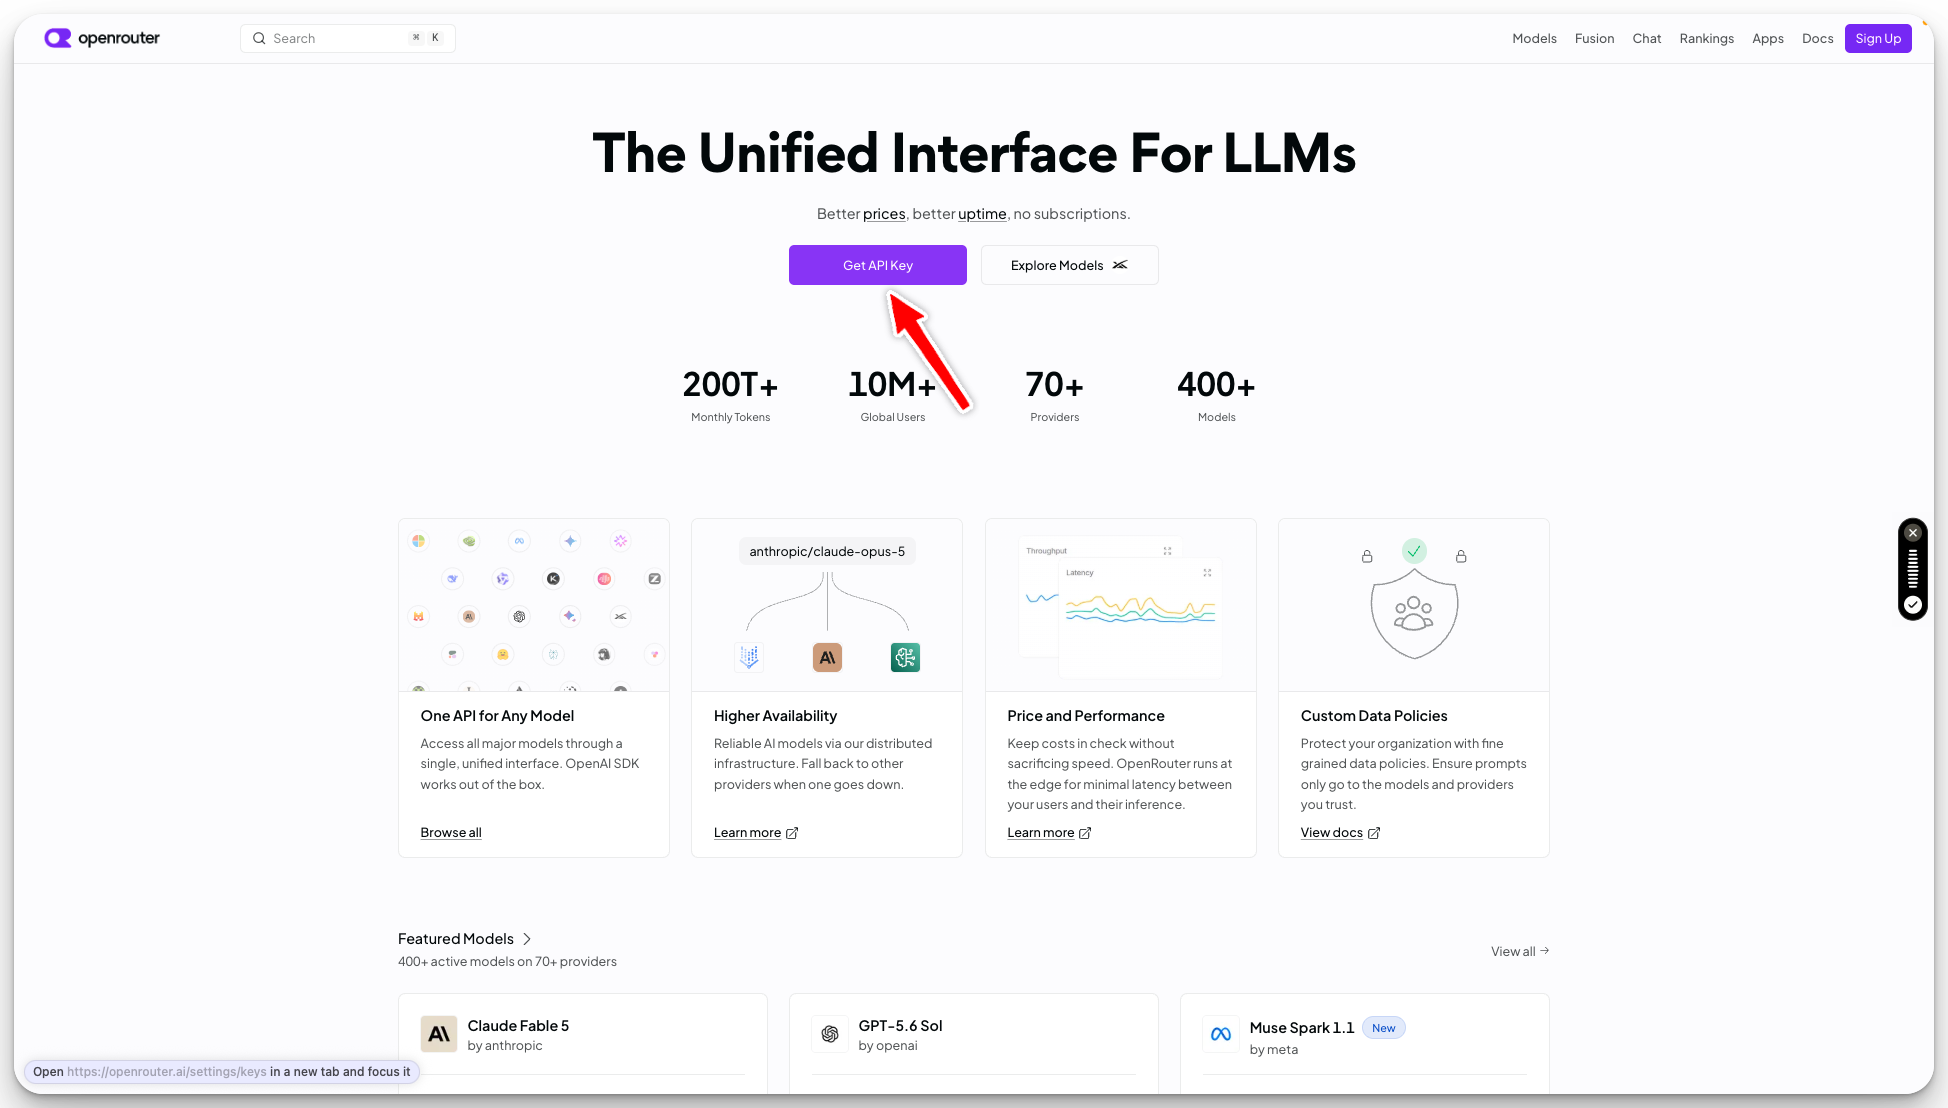
Step 1 — Go to OpenRouter and click "Get API Key"
Head to openrouter.ai and click Get API Key.
Step 2 — Sign in (or create a free account)
If you're not signed in, OpenRouter will ask you to sign in or sign up. Use Google or an email — it takes a few seconds. Once you're in, you'll land in your OpenRouter dashboard.
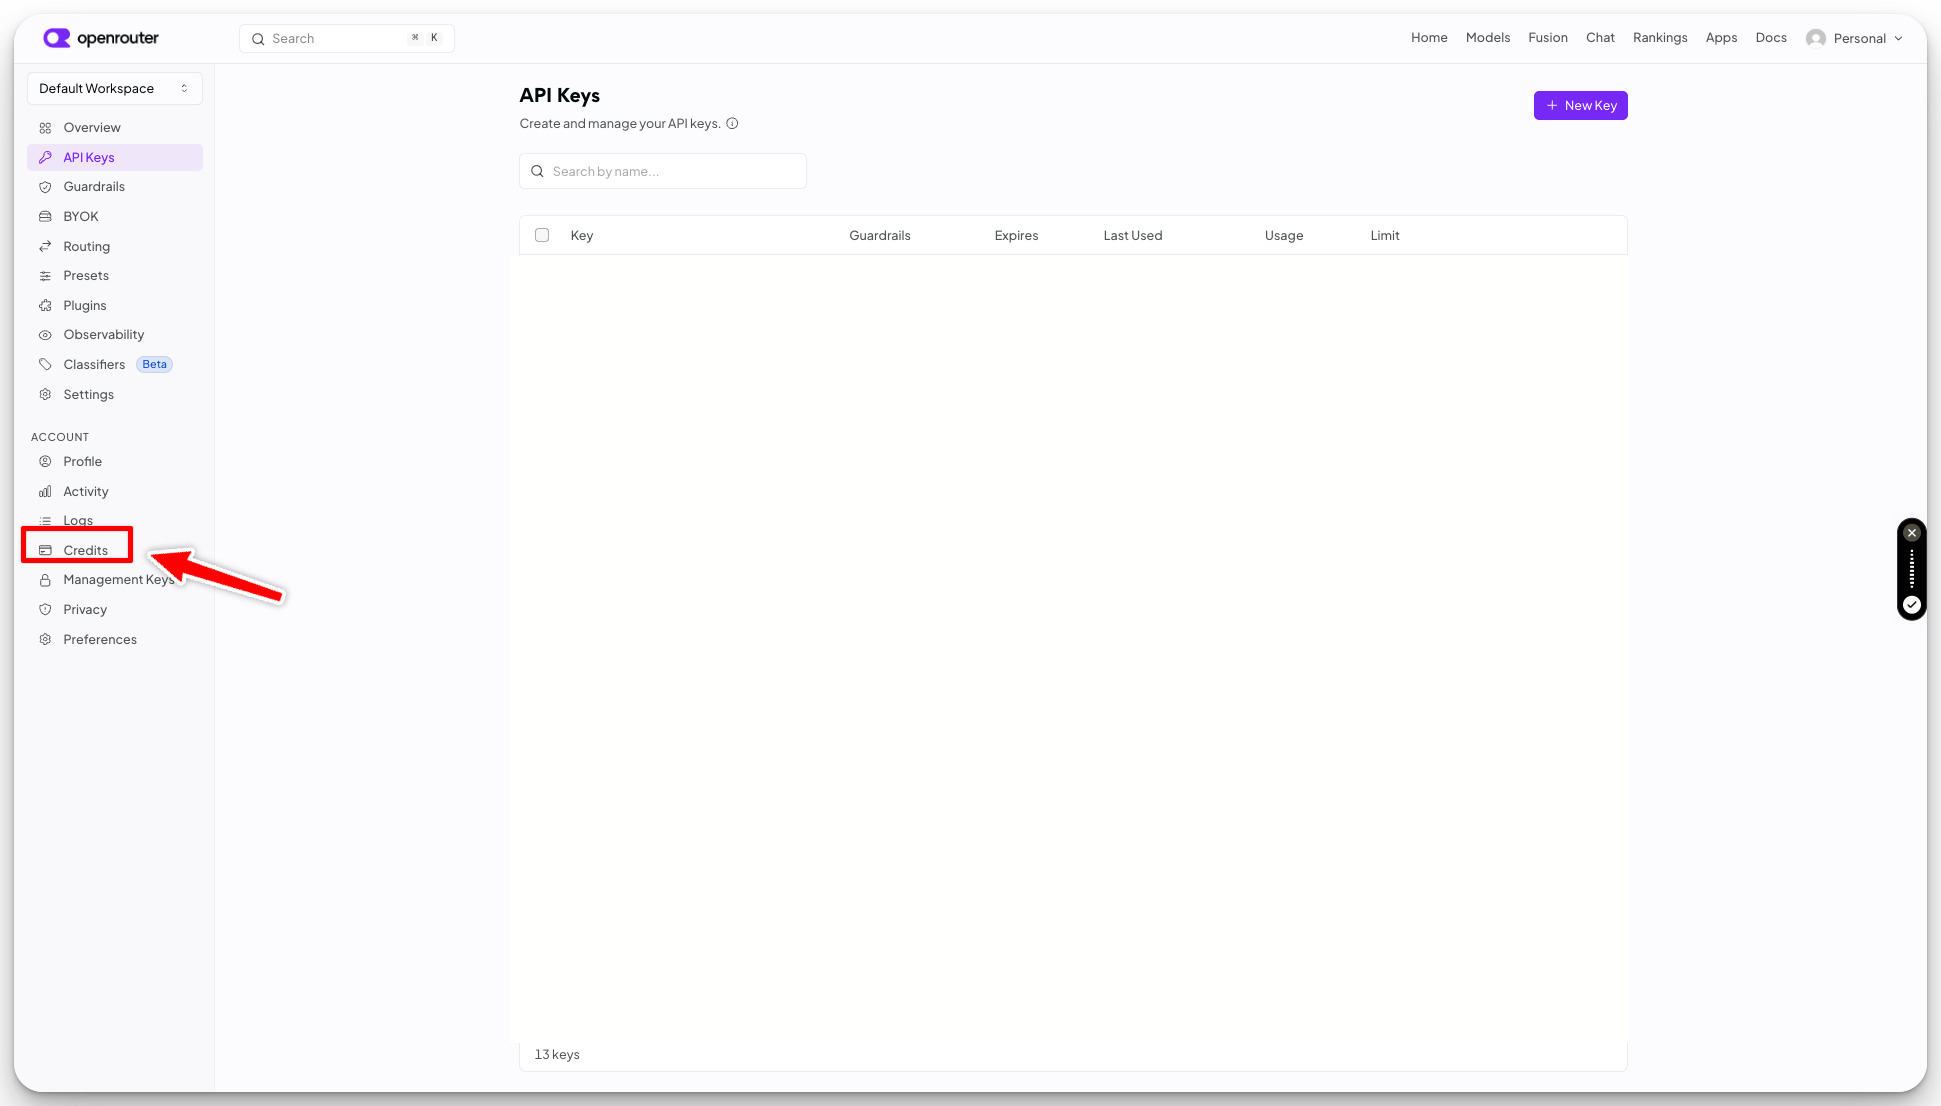
Step 3 — Open the "Credits" page
Before making a key, let's add a bit of credit. In the left sidebar, click Credits.
Step 4 — Add Credits ($5–$10 is plenty to start)
Click Add Credits and add a small amount — we suggest $5 to $10 to start. This is your balance that SheetXAI will draw from as you use it.
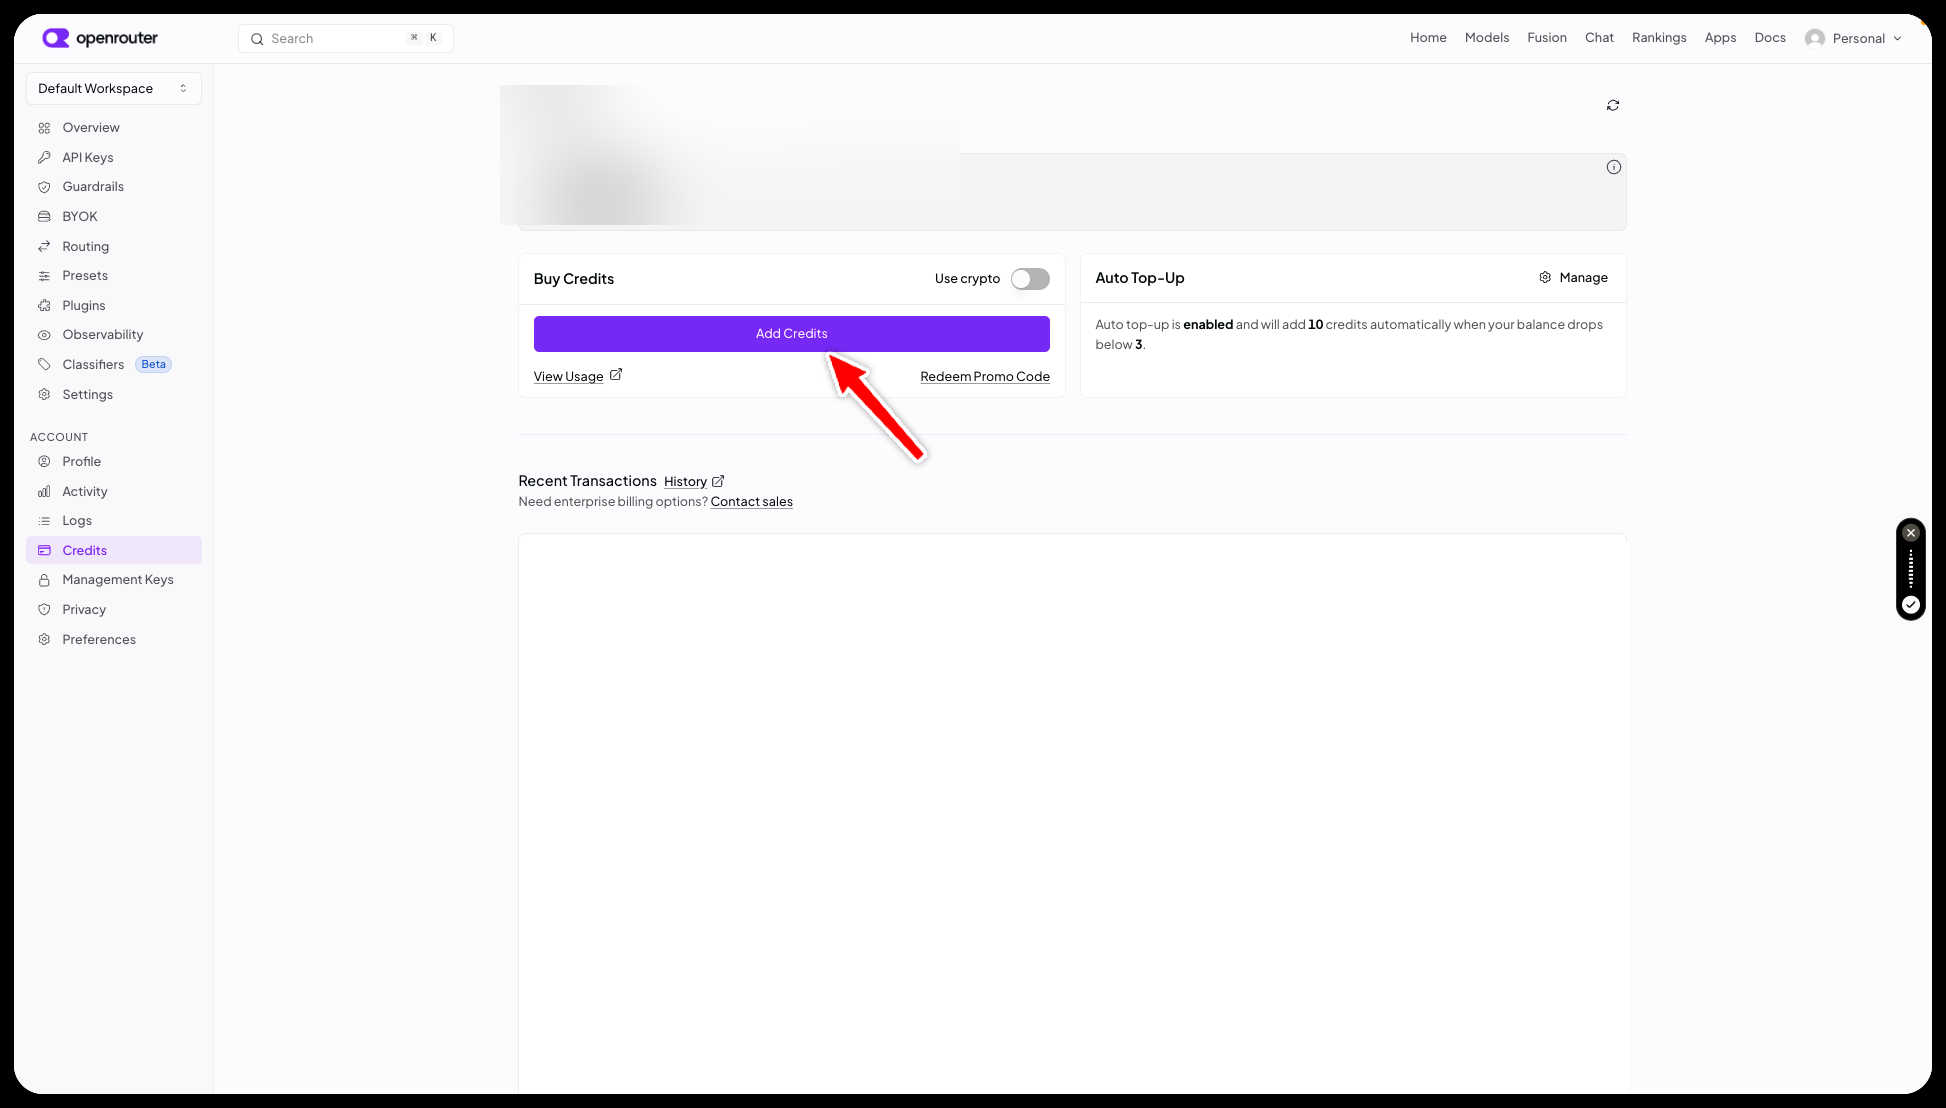
Optional (but recommended): OpenRouter also has an Auto Top-Up option that automatically adds credit when your balance runs low, so you never get interrupted. It's completely optional — but we recommend setting it up so SheetXAI never stops mid-task.
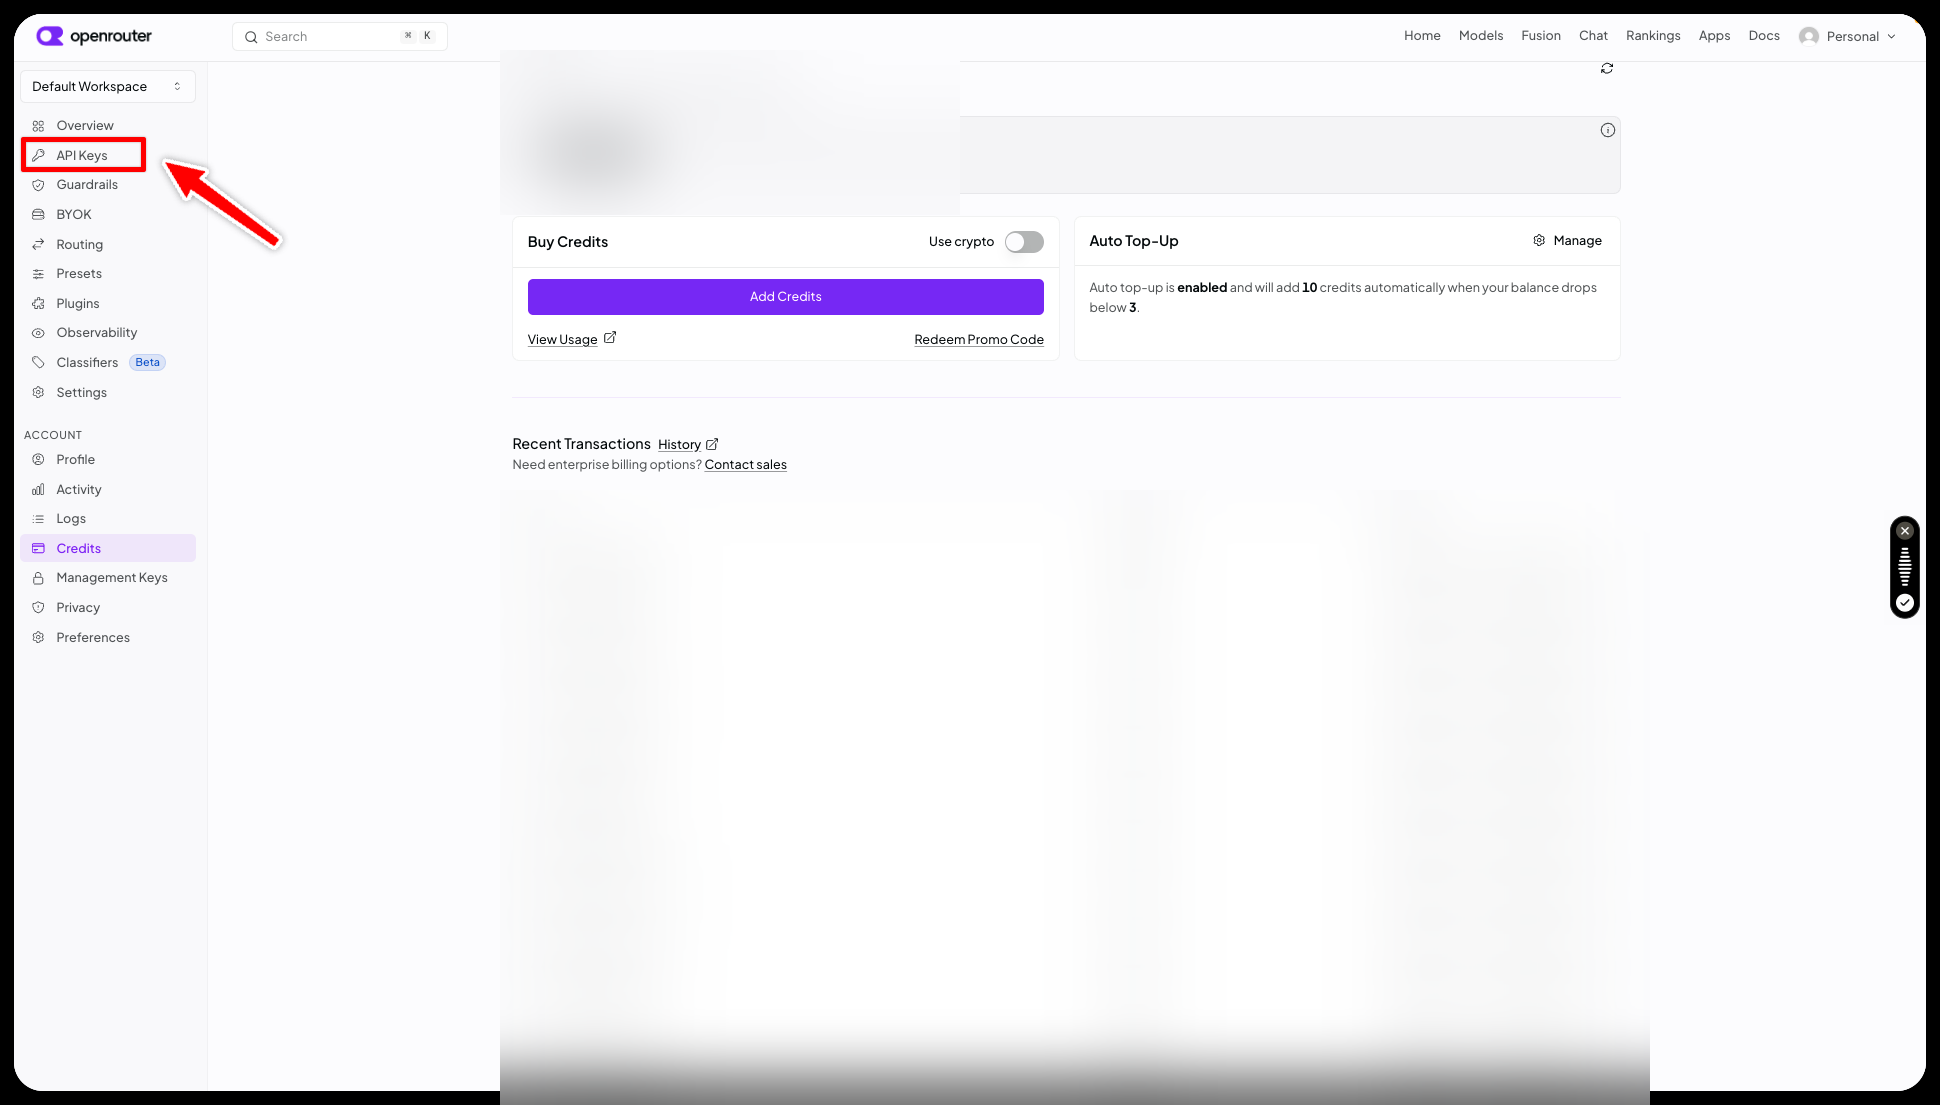
Step 5 — Go back to "API Keys"
Once your credits are added, go back to API Keys in the left sidebar.
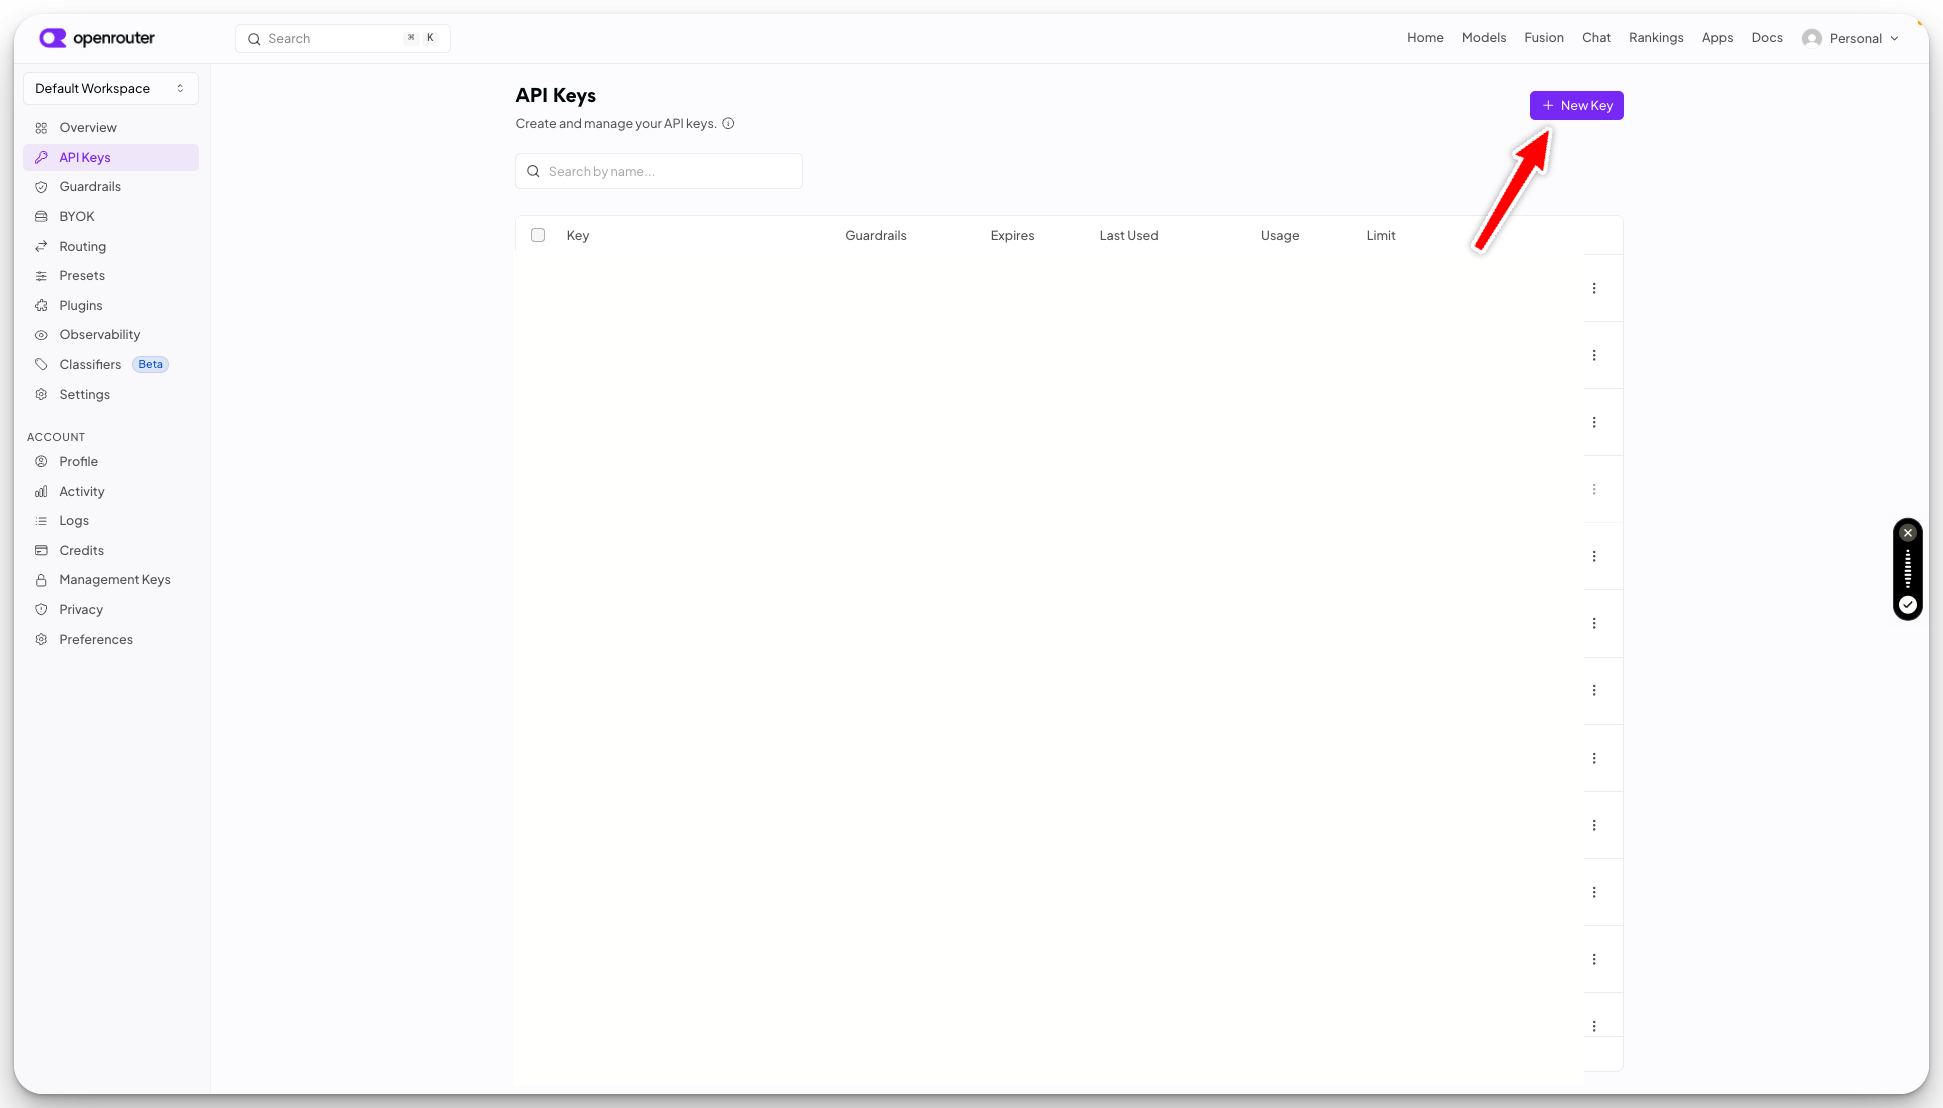
Step 6 — Click "New Key"
On the API Keys page, click + New Key in the top right.
Step 7 — Name your key (and optionally set a limit)
Give your key a name so you remember what it's for — for example, SheetXAI.
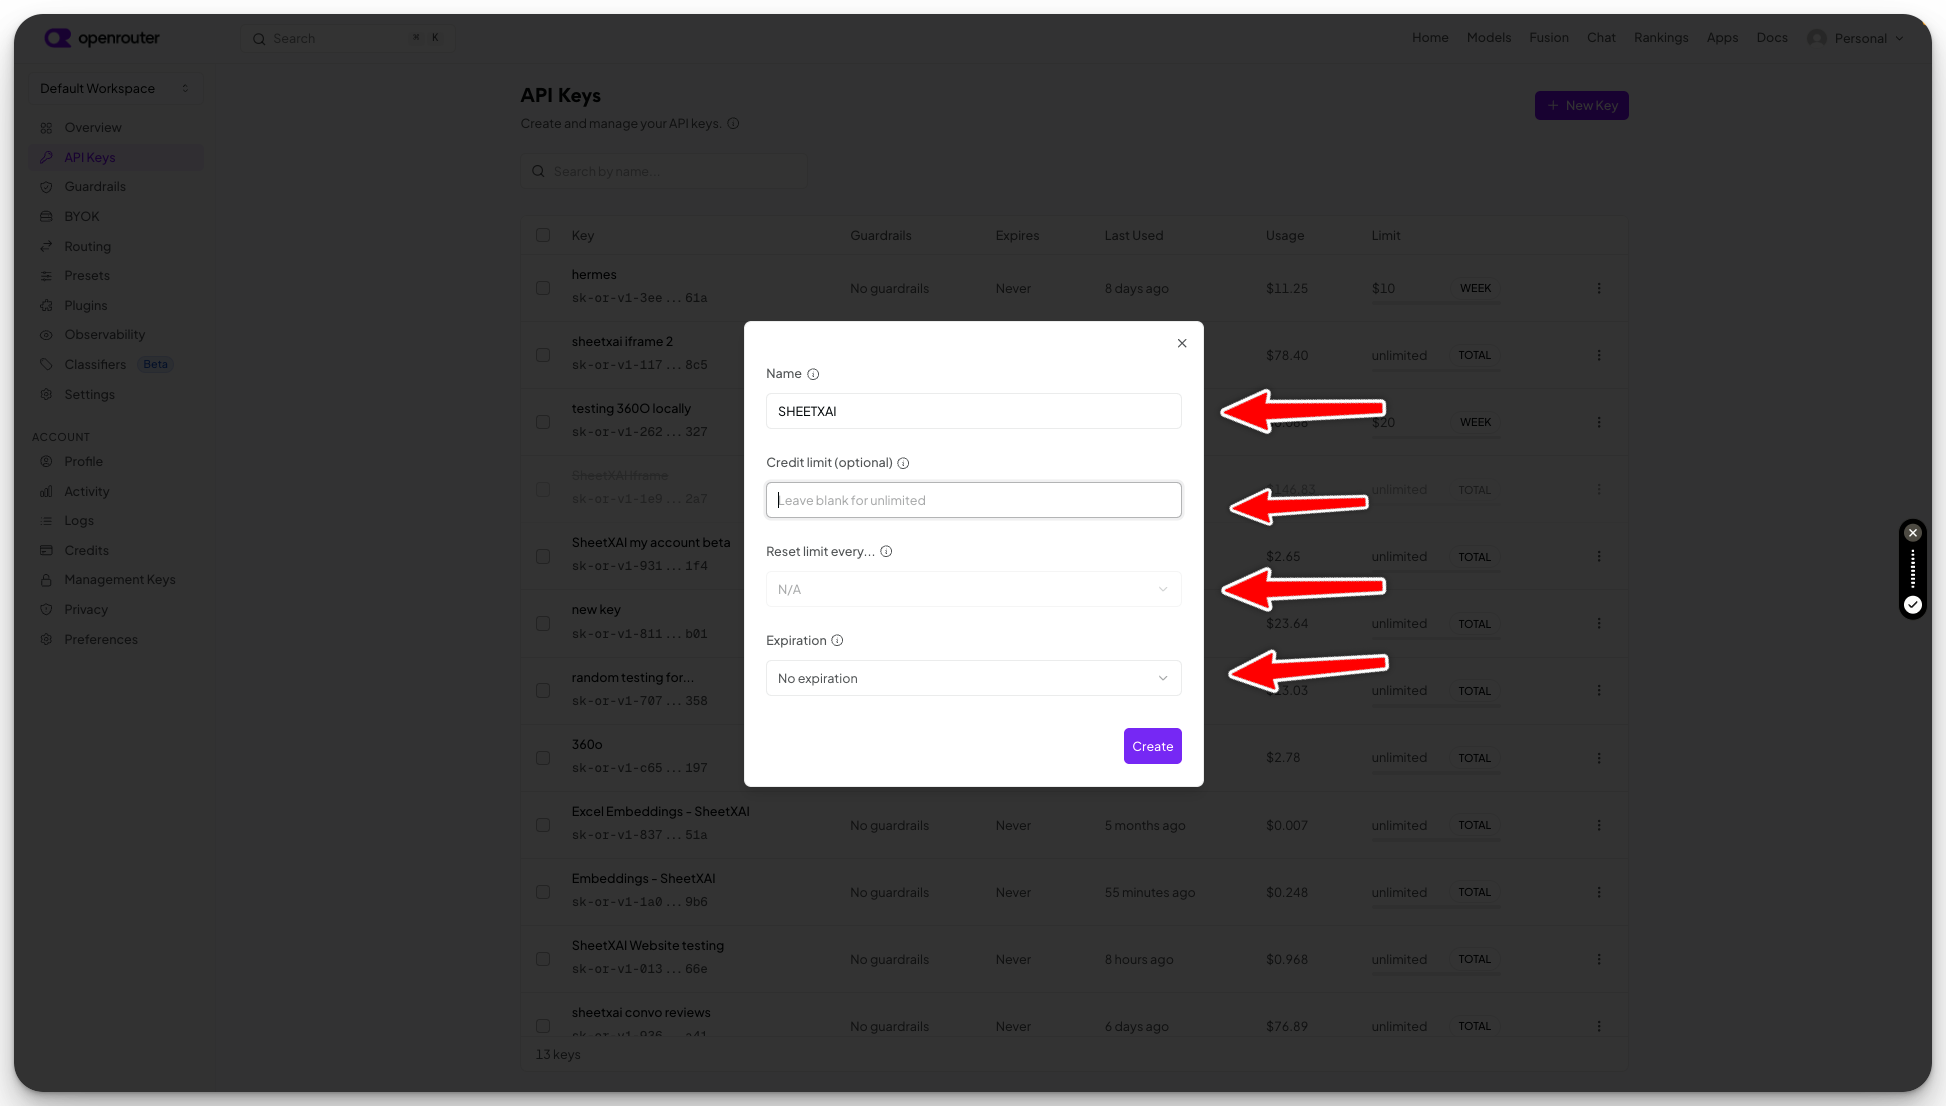
Credit limit (optional): You can cap how much this key can spend. If you set a limit, we recommend also setting a "Reset limit every…" so it becomes a recurring cap instead of a one-time hard stop — for example, "$5, resets every month." That way you're never surprised by a bill, and the key keeps working month to month.
Leave both blank if you'd rather not set a limit. Then click Create.
Step 8 — Copy your key
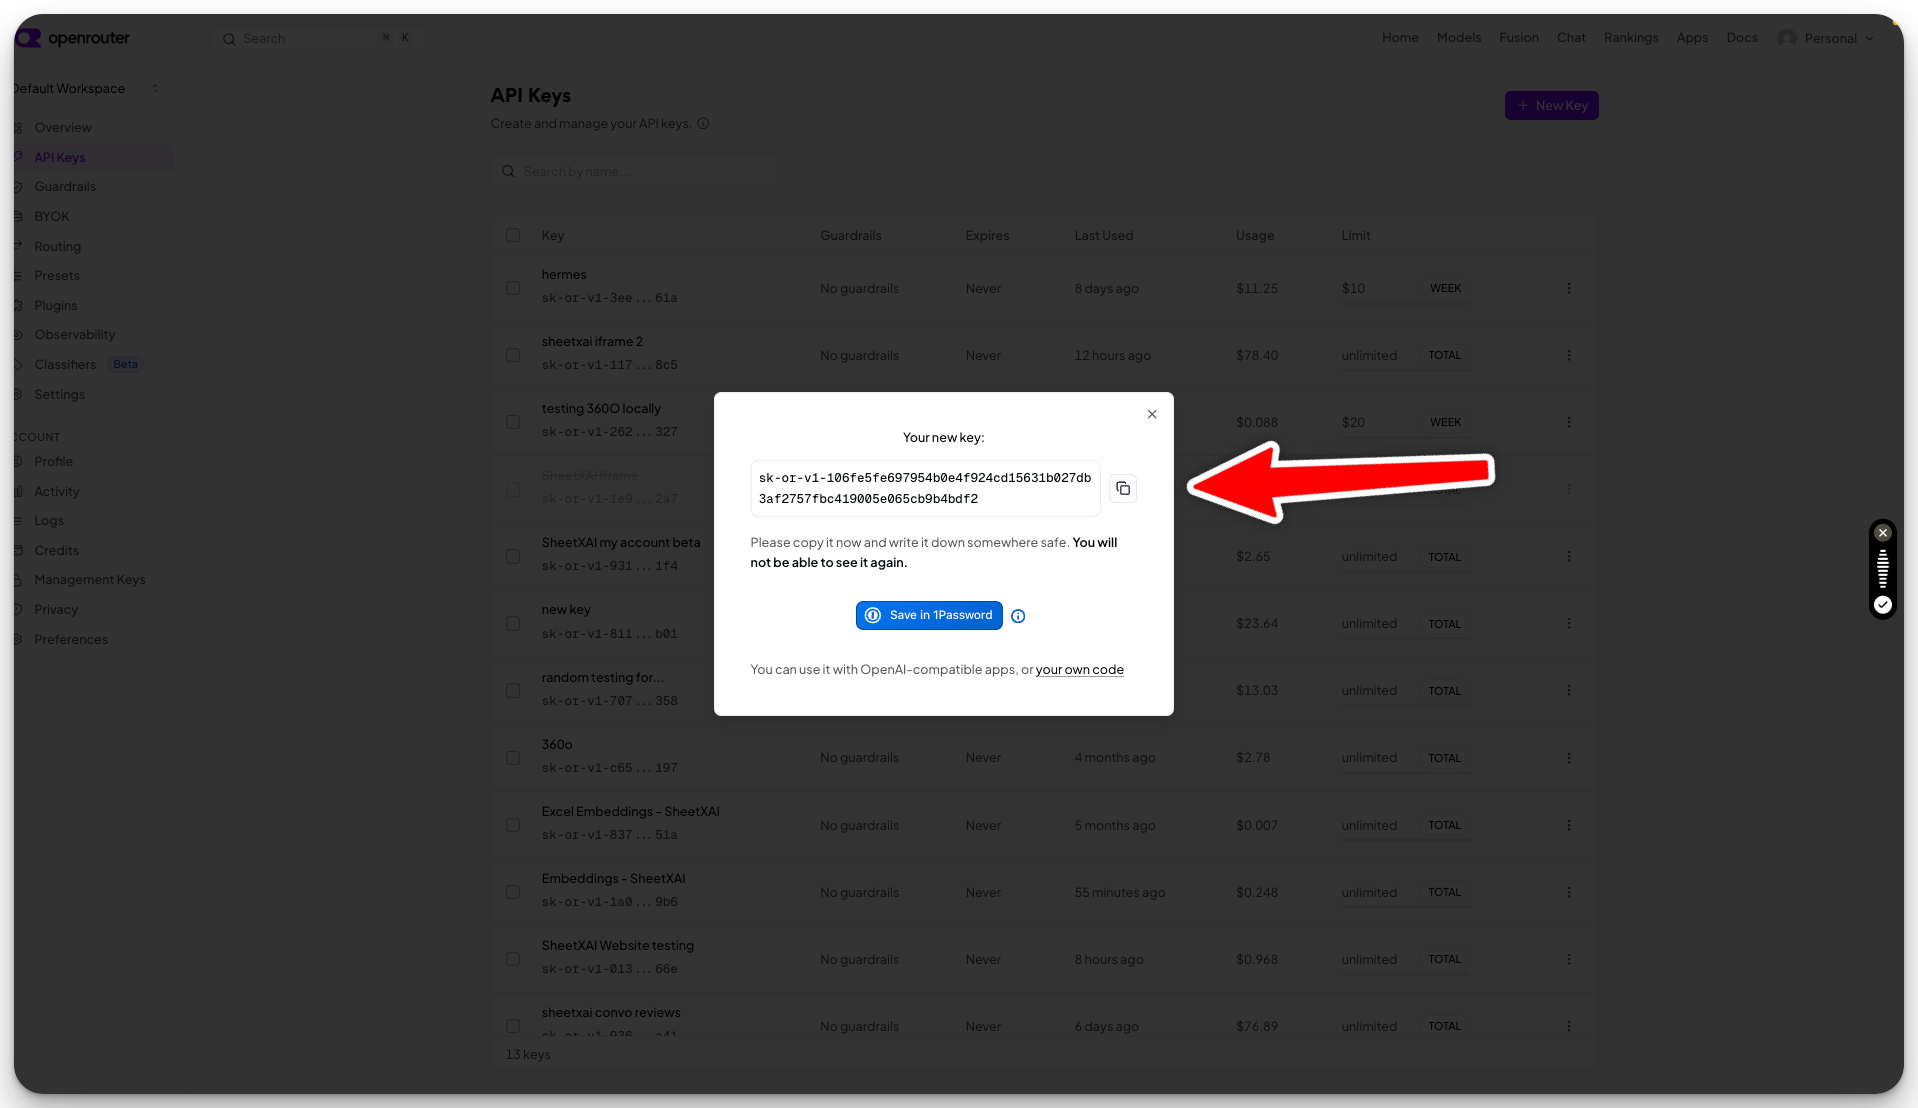
OpenRouter will show your new key once. Click the copy icon and keep it somewhere safe — you won't be able to see the full key again.
Step 9 — Paste it into SheetXAI
Back in SheetXAI, choose OpenRouter as your provider and paste the key into the box. That's it — you're connected and ready to go. 🎉
Need help finding where to paste it? See How to Set Your API Keys in SheetXAI.
Running low on credits?
As you use SheetXAI, your OpenRouter balance goes down. When it runs low, SheetXAI will let you know — but you can also check anytime on your OpenRouter Credits page and top up. Just click Add Credits again (or turn on Auto Top-Up so it never runs out).
Prefer not to manage a key?
No problem — BYOK is just an option, not a requirement. You can add SheetXAI credits to your account instead and let us run everything on our side. See that guide for how to add credit packs from your LTD Manager dashboard.